Microcontroller Class D Amplifier, Rev2
11 March 2012

A problem of the first revision of this amplifier was the limited precision at low volumes. Although the PWM of the ATtiny45 is just 8-bit, I realized that it can produce arbitrary precision output. Timer1 can be clocked at 64 MHz from the high frequency PLL, which combined with the double-buffered counter compare value and the overflow interrupt, can get 9 and even 10-bit precision in the audible range. Lets say we want to DAC the value 300/512. We set OCR1A to 255 (which will hold the output high) and on the timer overflow, we write 300-255 = 45. Writing this 9-bit value takes 2 timer cycles.
I made a few other small improvements:
- Replaced the BJTs with MOSFETs. This reduces ADC noise by removing the loads at the output pins of the MCU and also drops the component count because we no longer need the base resistors.
- Added a filtering capacitor at the ADC ARef port (which is now available after replacing timer0 with timer1). This allows us to use the internal 2.54V ARef voltage for 2.54Vpp input.
- Added a better output LC filter to protect the speakers from switching noise.
I experimented with 2 output stage driving strategies:
- 0% duty cycle at idle. This is the most efficient driving method because only one side of the H-bridge is switching per cycle. It didn't work too well in practice because at low volumes we might get just 1 pulse in 512. The raise and fall times of the drivers were not fast enough for such a short pulse introducing error (this pulse has too high frequency harmonics for my implementation).
- 50% duty cycle at idle. It might seem as a waste, but note that at idle both sides raise and fall simultaneously, so no current goes through the speaker. A small downside is a little power loss at the cross-over Vgs of the power MOSFETs. This strategy sounds perceivably better, though.
Dithering is no longer required, but still the output interrupt got a bit longer.
// 2x 9-bit PWM. 50% duty cycle at idle.
u8  time;
u16 pos;
u16 neg;

ISR(TIMER1_OVF_vect) {
    if(1 & ++time) { // every odd cycle
        u16 adc  = ADC;
        s16 val1 = (adc >> 1) - 256;
        u8  val2 = (u8)(adc & 1);

        pos = 256 + val1 + val2;
        neg = 256 - val1;

        if(val1 >= 254) // prevent wrap-around
            pos = 510;

        if(val1 <= -255)
            neg = 510;

        if(pos > 255) {
            DACP = 255;
            pos -= 255;
        } else {
            DACP = pos;
            pos = 0;
        }

        if(neg > 255) {
            DACN = 255;
            neg -= 255;
        } else {
            DACN = neg;
            neg = 0;
        }
    } else { // every even cycle
        DACP = pos;
        DACN = neg;
    }
}
where DACP and DACN are the two PWM registers.

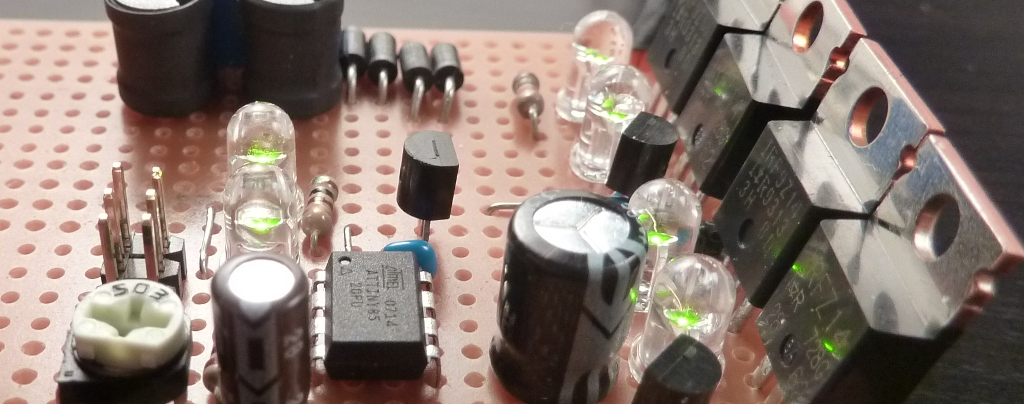
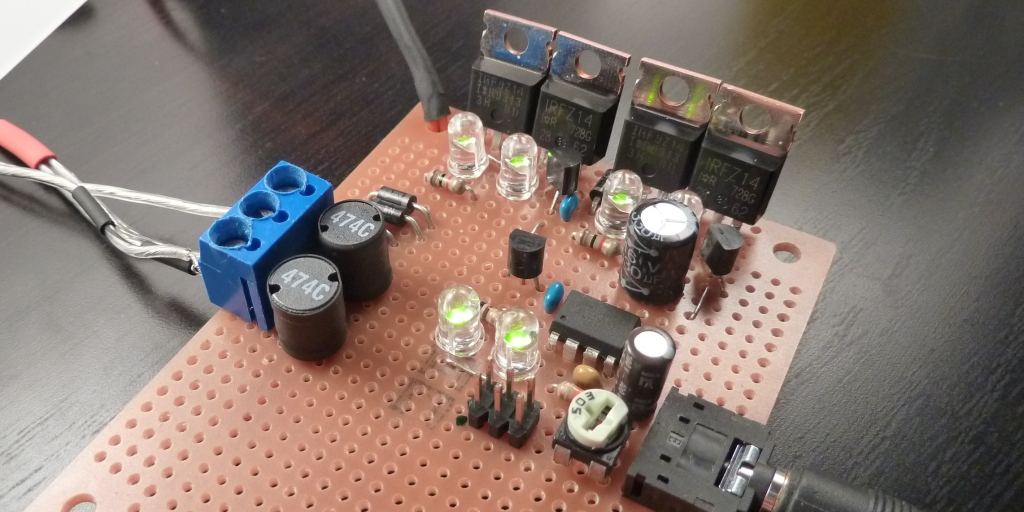
The LEDs are all functionally required - I use them as zener diodes.
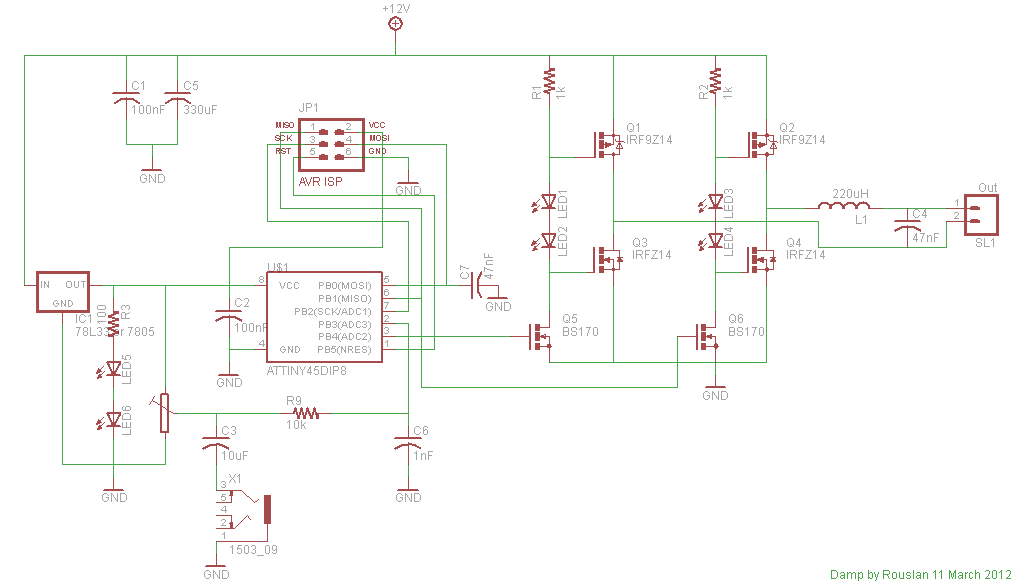
The following links contain a picture of the schematic and the eagle schematic + C source code.

Circuit diagram.
See the first revision for a video.
Update May 2014
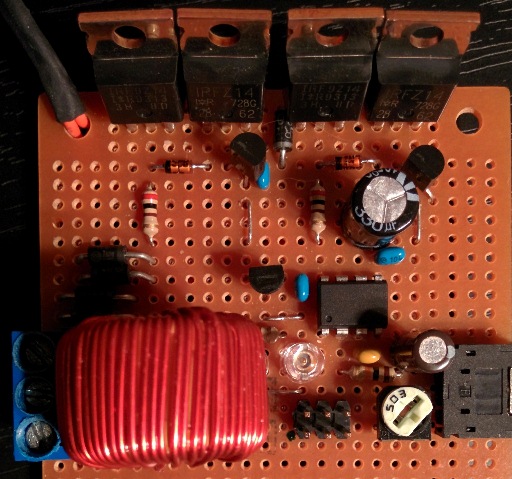
I had a few hours to revisit the amplifier. I replaced the LEDs with zener diodes, exchanged the resistors to clean up the switching characteristics, and replaced the filtering inductor to reduce it's resistance. It works more efficiently now (FETs aren't as warm) and is more powerful (less energy lost in the small inductors I had before).

Comments for Microcontroller Class D Amplifier, Rev2
Danny Flam on December 29, 2012
Then again, http://www.wpi.edu/Pubs/E-project/Available/E-project-042711-190851/unrestricted/PWM_Techniques_final.pdf Interesting idea: drive each half of the output devices separately, using 3 level PWM and you will have even less noise. might be a simple modification? but then you can do 3 level PDM and get even higher accuracy... :)
Alexander on December 30, 2012
Hi! could you just send me the hex file on e-mail please? I can't seem to compile the source code available on the webpage. Thank you!
Matic on January 29, 2013
hello. I was wondering and it is not mentioned if this is a mono or stereo amplifier. It seems like it is mono or monoblock? Could it be run at higher than 70w power? Thank you for the answers.
Bob C. on January 30, 2013
I just got done breadboarding this. The sound is not bad. I had to substitute IRFZ34 and IR9Z34. Couldn't find a reasonable price on the others. They run hot using a 12vdc supply. I assume this is because the RDS is lower than the IRFZ14. Adjusting the 12v supply down to 10v allows it to run cool with no heat sinks. The only major snag was programming the fuse bits on the attiny85. You have to make sure to switch the clock to PLL. Cost me a little time because I'm not an Atmel expert. Having fun with it. Thank you
Shaun on February 11, 2013
How can I get this to work on an Atmega32? Several functions come up as undeclared when I compile.
Frederik Crevits on February 21, 2013
Why do you use LED's in the circuit?
zigulinis7 on February 22, 2013
What should be the fuse bits? Should I check PLL?
Bob C. on February 23, 2013
These are the fuse bits I used: http://www.frank-zhao.com/fusecalc/fusecalc.php?chip=attiny85&LOW=E1&HIGH=DF&EXTENDED=FF&LOCKBIT=FF
Tom on March 7, 2013
There are 4 more z-diodes in the picture.I can't finde them in the schematics? Can you update your schematics.
brian on March 29, 2013
can you show me how the 4 diode is connected?
Kstutis on April 5, 2013
Hello :) can i use any of power fets instead irf9z14 and irfz14? can i use any fet for bs170? what is THD for this amp??? thanq you. p.s. higher Vdd higher the power? if i use 50V instead 12v?
Rouslan on May 28, 2013
Tom & Kstutis, I used LEDs instead of zener diodes just for fun (and to see what's going on). To increase the supply voltage and get higher power, you'll need to pick appropriate zener diodes to bias the gates of the power transistors such that they never turn on simultaneously. I don't recommend that however, since the ADC is not precise enough for higher gains. It will be nice exercise to get negative feedback and actually ADC the difference between output and input. This might be hard with the bridged circuit, but should be easy with a single ended one. Finally, you could use any transitors as long as you bias them correctly. This doesn't need to be too precise and likely the circuit will work as is. If the power FETs get warm, use zeners with slightly higher breakdown voltage.
cam on June 21, 2013
Have you ever layed out a PCB for your design?
zektor on July 15, 2013
hi could you email me the hex file pls. i cant seem to complie the source code
zektor on July 31, 2013
i have compiled the asm in avr studio when i load the hex file to the ic the amp does not work only 2 led is lit.can you tell me what is wrong?
Jose Roman Tan on October 6, 2013
HI, I would really like to see stereo variant of this circuit that uses 1 attiny chip. Thanks
Csaba on November 4, 2013
Hi, I wonder if you could make a direct-digital input amplifier, skipping the ADC-DAC. Digital inputs: I2C, I2S, SPDIF or other PCM
Mauro Giroldo on March 19, 2014
Hi, I just wonder if you ever had designed a PCB for this circuit, it was a great job and I want to build one of this for me as well, by any chance you have the components list? Just to make sure Im buying similar components... Thanks
Rouslan on March 23, 2014
Mauro, to get the component list, open the schematic in Cadsoft Eagle and go to File -> Export -> BOM.
Cam, sorry I didn't do a PCB layout for this project, but you are welcome to share yours with us :)
Zektor, it sounds like the PWM is not working for you and the output is a solid low or high (depending on which LED is on / off).
Alexandr on March 26, 2014
nice work, please give me hex file
zektor on April 12, 2014
could you email me the hex file maybe there wrong with my compiled hex
zektor on April 17, 2014
could you email me the hex file thanks
Beto on April 22, 2014
Please, Is possible for you to send me the .hex file, I give you my email. Thanks, good job!.
Mauro Giroldo on May 23, 2014
Hi Rouslan, I have traced the circuit to identify if i have missed something, sorry but i could not find the 2x100nF Capacitors C1 and C2 (on the schematics), are they used only for the Pic and removed? At the same I could not get the Zenners connections and the L1 220uH you have used 2x 474C??? I just find the 220uH (single one in the market) and the encapsule marks are 220C Can you please clarify? I made a picture with identifies the components, Can you have a look if you have time, I can send you by email? Thanks Mauro
Dougal on June 18, 2014
Hi Rouslan. Could you include your May improvements into the downloadable schematic, please? Or maybe a more detailed description?
mauro on July 24, 2014
Hi Rouslan, I put a thread at the AudioDiY forum and a colleague said that there is no negative feedback and therefore it should be just a good exercise, I believe your project is great and I really liked your idea, can you include something like SPDIF input and volume , tone controls together with a mixer inputs? Thanks
Mauro on July 24, 2014
You can found the thread on the link below: http://www.diyaudio.com/forums/class-d/259286-class-d-amp-using-attiny45-microprocessor-new-post.html Have fun... Thanks
sushil on July 25, 2014
Can you please list the components that are needed for the build??
Serhat Kaya on October 28, 2014
Thank you for that great amplifier details. I don't know C language and in C code source have (in first version) #include <avr/interrupt.h> #include <avr/sleep.h> #include <stdint.h> code lines but have not that h extension files is that file embedded and not need thats and last questin how can compile that c file thanks for circuit and codes regards Serhat
goobiez on December 4, 2014
can help me.. can you send full code program attiny45 power class D to email goobiez11@gmail.com. .thanks
Bruno on January 20, 2015
Hello. Could you make a program flow diagram so it is possible to translate it into other lenguages or other MCUs like Freescale or Microchip? I program in C but I dont understand the program at all. Attiny45 is not available in local stores or buying it would be so expensive because of where I live. What's the PWM frequency? I will try to calculate the filter. How do you know if your self made inductor is correct? Just listening? If you can make a diagram or tell me how to program it in other MCUs (timer values, ADC sampling rate, algorythms, etc) please contact me to Rbruno96@hotmail.com Thank you in advance.
Bruno on January 26, 2015
Hello again. I made a very simple program in a Freescale MCU. It's so simple, it makes ADC conversions every 3.5us (about 285KHz sampling, fine to me). A center alligned PWM (not so accurate but a 8-bit one) register is modified every time a new convertion is made. This is what drives the MOSFET pair (without any H-bridge). What I wanted to use is a combinational logic gate circuit so I could turn off BOTH transistors simultaneously (doesn't matter what is at the input) for a while, that would supress the dead time. I know it will lower the maximum output voltage and power but will increase the efficiency (dead-time drain to drain short circuit would be supressed). I didn't use any dither function, the only problem I have is that the wire I used to connect my phone (audio signal source) is defectuous and I have to move it till I get something at the output. About the inductor I unsoldered some coils from a motherboard (don't even know the value) but they seemed to be very small. I removed the coil original copper wire and replaced it with a smaller one but about 8 times more turns. The output is very clear but I get a smooth noise (maybe coming from the preamplifier). Contact me to rbruno96@hotmail.com if you want to know more about this method. Thank you for the idea, I wouldn't ever thought it was possible to make with a MCU.
Rushikesh on March 26, 2015
hey Rouslan I am going to make this circuit. It really gives 70w? your woofers shown in the video connected in parallel were of how many watts?
Konstantin on July 15, 2015
Hello, can help me.. could you email me the hex file maybe there wrong with my compiled hex Thanks. kotic1981@mail.ru
Kostya on July 17, 2015
Hello, can help me... can you send hex code program attiny45 power class D to email kotic1981@mail.ru Thanks
Angelo on September 1, 2015
Could you tell me which C compiler did you use and where I can find the h files. Thank you again Best Regards
Rian on September 27, 2015
Morning, halllo Rouslan... can you senn me fpr hex file... iam very newbie... Rina Jakarta - Indonesia
Lorenz on December 20, 2015
What voltage should the zener diode have?